
On this page
Top picks at a glance
As an Amazon Associate I earn from qualifying purchases.
- 1
 BPA-Free Nonstick Silicone Dehydrator Sheet for ExcaliburView on Amazon
- 2
 NESCO FD-75A Snackmaster Pro Food DehydratorView on Amazon
- 3
 NESCO FD-1018A Gardenmaster Pro Food DehydratorView on Amazon
- 4
 NESCO FD‑80A Square Food Dehydrator for SnacksView on Amazon
- 5
 Nesco FD-37A Food Dehydrator for HerbsView on Amazon
- 6
 NESCO FD-1040 Gardenmaster Digital Pro 4 Tray Food DehydratorView on Amazon
A basket of sliced apples and a tray of garden herbs leave a home gardener asking how to use a Nesco food dehydrator, and the answer is simpler than the machine looks. Set up the trays, load the food in one layer, set the heat and time, check the batch as it dries, then cool and store it. This guide walks through each step in order, using the figures real listings state, and points to our comparisons where we line up specific machines and accessories.
Runners-up to consider
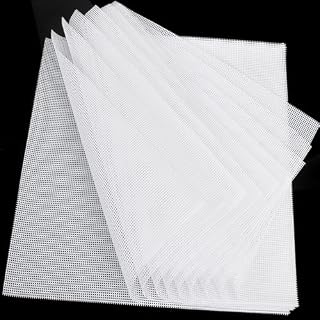 BPA-Free Nonstick Silicone Dehydrator Sheet for ExcaliburCheck price on Amazon
 NESCO FD-75A Snackmaster Pro Food DehydratorCheck price on Amazon
 NESCO FD-1018A Gardenmaster Pro Food DehydratorCheck price on Amazon
 NESCO FD‑80A Square Food Dehydrator for SnacksCheck price on Amazon
 Nesco FD-37A Food Dehydrator for HerbsCheck price on Amazon
 NESCO FD-1040 Gardenmaster Digital Pro 4 Tray Food DehydratorCheck price on Amazon
HarvestGearLab earns a commission when you buy through links on this site, at no extra cost to you. As an Amazon Associate I earn from qualifying purchases. Affiliate disclosure.
How to use a Nesco food dehydrator: the short list
Most batches follow the same steps, whatever you are drying. The table shows each step, what to do, and what you need.
| Step | What to do | What you need |
|---|---|---|
| Set up | Place the machine on a flat counter and stack the trays | Trays and a power outlet |
| Prep | Wash the food and slice it evenly | A knife and a cutting board |
| Load | Spread food in one layer with space for air | Mesh sheets for small foods, such as 14 by 14 inch sheets |
| Dry | Set the heat and time, then check progress | The machine controls and current drying guidance |
| Store | Cool the batch, then pack it away | Jars or bags for storage |
Set up the machine
Set the dehydrator on a flat, steady counter with space around it for warm air to move. Stack the trays on the base and check that each tray sits level before you load any food. Plug the machine in and make sure the controls respond before the first batch goes in. A machine that wobbles or sits against a wall dries unevenly, so give it a clear spot on the counter and keep the cord away from the edge.
Prep the food
Wash the food and slice it into even pieces so each piece dries at the same pace. Thick pieces dry slowly in the middle while thin pieces finish early, so aim for slices that match each other rather than a fixed size. Pat the pieces dry before loading, since surface water adds time to the batch. Herbs need only a rinse and a shake dry, while fruit and vegetables need a wash and a slice. See our food dehydrator tips for more on even slicing and loading.
Load the trays
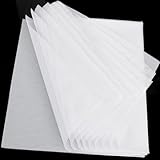
Spread the food in one layer with space between the pieces so warm air can reach every side. The Kispog sheets (on Amazon) use a 1mm mesh structure that lets air through on all sides while keeping tiny berries, sliced herbs and seeds on the rack, and the listing says the 360-degree airflow stops small foods from falling through large metal tray grids. Each 14 by 14 inch mat is pre-cut for Excalibur machines but can be trimmed with household scissors to fit round or square trays from Cosori, Nesco and Magic Mill, and each set holds a 10-pack of mats. Leave a gap between pieces rather than packing the tray full, since crowded trays block airflow and dry unevenly. Our drying net vs dehydrator sheets comparison lines up the ways to hold small foods.
Set heat and time
Set the temperature and the timer to match the food and the guidance you follow, then let the machine run. Take the heat and time for each food from current USDA and National Center for Home Food Preservation guidance, or from a current edition of a trusted food drying guide, rather than guessing. The silicone sheets are rated safe for temperatures up to 450°F, so the mat is not the limit on heat; the food and the guidance set the numbers. Once the batch is running, leave the door shut and let the warm air work, since opening the door drops the heat and adds time.
Check the batch as it dries
Check progress through the door without opening it when you can, and look for pieces that dry faster than the rest. Move the faster pieces to the top tray or take them out early, and let the slower pieces keep drying. Fruit is done when it feels leathery and pliable with no damp spots, herbs are done when they crumble between your fingers, and jerky is done when it bends without breaking and shows no damp spots. Our how a food dehydrator works guide explains the warm air, trays and time behind each batch.
Cool, pack and store
Let the batch cool on the trays before you pack it, since warm food traps moisture in the jar. Pack the cooled food into clean jars or bags, label each one with the food and the date, and store the jars in a cool, dark cupboard. Check the jars over the next few days for any sign of moisture, and move any jar that looks damp back to the trays for more drying. The sheets lift food intact from the trays, which keeps pieces whole for packing, and the high-release silicone coating lets meat oils and fruit sugars slide off without scrubbing.
Clean up
Cleanup is the easiest step when the trays and sheets come clean easily. The Kispog sheets are fully dishwasher safe, and the listing says meat oils and fruit sugars slide off the silicone coating without aggressive scrubbing. Wash the trays after each batch and let them dry fully before stacking, since a damp tray left in a stack can hold moisture. The 10-pack of sheets gives you spares, so a mat in the wash never stops the next batch.
What to skip or double-check
- Crowded trays: skip loading pieces on top of each other, since stacked food blocks airflow and dries unevenly.
- Small foods on bare grids: use a 1mm mesh sheet for berries, herbs and seeds, or they can fall through the tray grids.
- Oven use: the sheets are not for oven use, so keep them in the dehydrator and out of the oven.
- Trimming the sheets: trim a 14 by 14 inch mat with household scissors to fit round Nesco trays, and check the fit before you load food.
- Guessing at heat and time: take the numbers for each food from current USDA and National Center for Home Food Preservation guidance.
What this guide does not cover
This guide explains how to use a Nesco food dehydrator step by step. It does not give drying times or temperatures for specific foods, and it does not give recipes. Take those from current USDA and National Center for Home Food Preservation guidance, or from a current edition of a trusted food drying guide, and follow them exactly for each food. Every food drying guide on the site is collected in our food drying section.
FAQ: preserving at home
Do I need mesh sheets in a Nesco food dehydrator?
You need them for small foods. The 1mm mesh sheets keep tiny berries, sliced herbs and seeds on the rack, while larger pieces sit fine on the bare tray grids.
Can I cut dehydrator sheets to fit my Nesco?
Yes. Each 14 by 14 inch mat can be trimmed with household scissors to fit round or square trays from Cosori, Nesco and Magic Mill.
Are silicone dehydrator sheets dishwasher safe?
Yes, the Kispog sheets are fully dishwasher safe, and the listing says meat oils and fruit sugars slide off the silicone coating without aggressive scrubbing.
What temperature can silicone dehydrator sheets handle?
The Kispog sheets are rated safe for temperatures up to 450°F.
How do I keep small berries from falling through the trays?
Use a mesh sheet on the tray. The 1mm mesh keeps tiny berries on the rack while allowing 360-degree airflow around them.
More preserving guides
See every food dehydrator guide and all food drying guides.
More picks: dehydrator tips, how a dehydrator works, drying nets vs sheets and dehydrator costs.