
On this page
Top picks at a glance
As an Amazon Associate I earn from qualifying purchases.
- 1
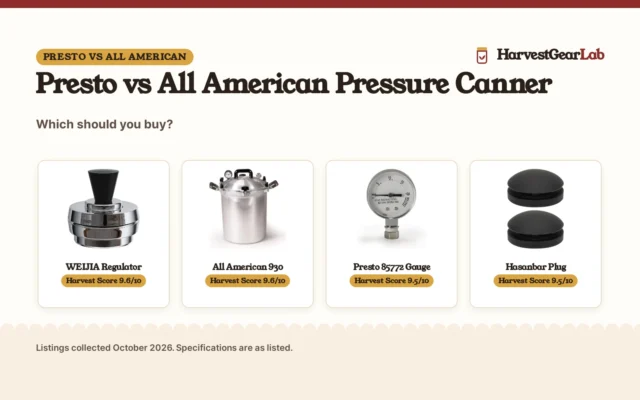
 All American 930 Canner9.6/10View on Amazon
- 2
 Presto 85772 Steam Gauge9.5/10View on Amazon
- 3
 WEIJIA 3-Piece Regulator9.6/10View on Amazon
- 4
 Stainless Steal Cooker Pressure GuageView on Amazon
- 5
 Presto 02144 12-Quart Digital Pressure CannerView on Amazon
- 6
 Presto 02152 17-Quart Digital Pressure CannerView on Amazon
- 7
 Presto 01784 23-Quart Induction Compatible Pressure CannerView on Amazon
- 8
 Presto 01755 16-Quart Aluminum Pressure Canner and CookerView on Amazon
A counter full of tomatoes and a pantry that still has room is the moment to learn how to use presto pressure canner models the right way. Start with the gauge, the seal and the lid, then work through every batch in the same order. This guide walks through the whole run, from the pre-batch check to the cool-down, and points to the figures the gauge listings state.
Runners-up to consider
 Stainless Steal Cooker Pressure GuageCheck price on Amazon
 Presto 02144 12-Quart Digital Pressure CannerCheck price on Amazon
 Presto 02152 17-Quart Digital Pressure CannerCheck price on Amazon
 Presto 01784 23-Quart Induction Compatible Pressure CannerCheck price on Amazon
 Presto 01755 16-Quart Aluminum Pressure Canner and CookerCheck price on Amazon
 Presto 85772 Compatible with 0175006Check price on Amazon
HarvestGearLab earns a commission when you buy through links on this site, at no extra cost to you. As an Amazon Associate I earn from qualifying purchases. Affiliate disclosure.
How to use presto pressure canner: the short version
Check the gauge and seal, add water and the rack, load filled jars, lock the lid, bring the canner up to the pressure the recipe gives, hold it there, then let the canner cool until the gauge reads 0 before opening the lid. Every step below follows that order, and the pressure and time always come from a current USDA recipe, never from habit.
Before the first batch: check the gauge, seal and safety plug
Start every batch with the lid parts. Look at the dial gauge and check that the needle rests at 0 when the canner is cool and open. Check the sealing ring for cracks or flat spots, and check that the overpressure plug and the vent pipe are clear. If the gauge needle sticks, reads high when the canner is cool, or the dial glass is cracked, fit a new gauge before canning. Replacement dial gauges for Presto models read 0 to 20 PSI. The MEASUREMAN black steel gauge lists a 0 to 30 psi range with a 2-inch dial, and the MEASUREMAN stainless gauge fits a 37-quart canner.
Match the gauge to the canner model. The 85772 gauge fits Presto models 01/CG22, 175001, 175005, 175006, 175107, 01755, 0175510, 178001, 178005, 178006, 178107 and 178410, while the 85729 gauge fits models 0175002, 0175003, 0175004, 0178002, 0178003 and 0178004. Part 85772 replaces 82237 and 82121. Check the part number on the old gauge before ordering a replacement, and compare current options in the best pressure canner gauge guide.
Fit a new gauge only when the canner is not in use and the lid is cool and clean. Put the silicone gasket on the lid, then the stainless steel washer, then screw on the nut, and tighten the nut so vapor cannot enter the dial. A gauge listing notes the swap takes within 1 minute, but take the time to seat every part in order rather than rushing the fit.
Set the canner up for a batch
Add water and the rack, then set the filled jars on the rack. The water amount varies by canner, so follow the amount in the canner manual and the guide on how much water a pressure canner needs rather than guessing. Leave the headspace the recipe gives, wipe the jar rims clean, and set new flat lids and bands on every jar. Use jars made for home canning, in the sizes the recipe calls for, and see the guide to types of canning jars for the sizes and mouth styles.
Set the lid on the canner and lock it in place, then check that the gauge and the regulator weight sit right. If the lid will not lock, lift it and check the seal and the vent pipe again rather than forcing it. A lid that locks smoothly and a gauge that reads 0 before heating are the signs the canner is ready.
Bring the canner up and watch the gauge
Set the canner on the burner and heat it with the vent open until steam flows freely, then set the regulator weight in place as the manual directs. Watch the dial gauge as the pressure rises, and adjust the heat to hold the pressure the current USDA recipe gives for the food in the jars. If the needle falls below the recipe pressure, raise the heat a little and wait for the needle to climb back; if the needle climbs past it, lower the heat. Never leave a running canner while you leave the kitchen, and never try to force the lid open while the gauge shows pressure.
Keep the pressure steady for the full time the recipe gives. The time comes from the recipe, not from the canner, and it changes with the food, the jar size and the altitude. When the time is up, turn the heat off and leave the canner alone to cool. Do not run cold water over the canner, and do not lift the weight to rush the cool-down.
Cool down and open the lid
Let the canner cool on its own until the dial gauge reads 0 and no steam escapes when the weight is touched. Wait for the lid lock to release, then tilt the lid away from the face so any last steam escapes away from the skin. Lift the jars straight up with a jar lifter and set them on clean towels, then leave them alone until the lids seal. Press the center of every lid to check the seal, and follow the current USDA guidance for jars that do not seal.
Clean up and store the canner
Wash the pot, the rack and the lid in warm soapy water, dry every part, and check the sealing ring and the gauge glass again before storing. Store the lid upside down on the pot or beside it, never locked in place, so air can move and the seal keeps its shape. Keep the canner in a dry place, and keep the manual with it so the next batch starts with the same checks.
What this guide does not cover
This guide explains the steps, not the recipe. It does not give recipes, processing times, pressures, headspace figures or altitude changes. Take those from current USDA and National Center for Home Food Preservation guidance, or from a current edition of a trusted canning guide, and follow them exactly for each food. Every canner and tool guide on this site is collected in the canning section, and the canning process guide compares water bath and pressure canning.
FAQ: preserving at home
What shows a Presto pressure canner gauge reads right?
When the canner is cool and open, the needle should rest at 0. Replacement dial gauges for Presto models read 0 to 20 PSI, so a needle that sticks, reads high when cool, or sits behind a cracked dial glass means the gauge needs replacing. A local extension office can check a dial gauge too.
Which replacement gauge fits a Presto canner?
Part 85772 fits Presto models 01/CG22, 175001, 175005, 175006, 175107, 01755, 0175510, 178001, 178005, 178006, 178107 and 178410, and part 85729 fits models 0175002, 0175003, 0175004, 0178002, 0178003 and 0178004. Check the part number on the old gauge, and compare options in the best pressure canner gauge guide.
How much water goes in a Presto pressure canner?
The amount varies by canner, so follow the amount in the canner manual rather than guessing. The guide on how much water a pressure canner needs explains how to fill the canner for a batch.
Can an electric pressure cooker be used as a pressure canner?
No, unless the maker states it is made for pressure canning. A cooker sold only for pressure cooking is not a canner, even if it looks like one, so check the listing and the manual before using it for jars.
How to fit a new gauge on the lid?
Fit the gauge only when the canner is not in use and the lid is cool and clean. Put the silicone gasket on the lid, then the stainless steel washer, then screw on the nut, and tighten the nut so vapor cannot enter the dial. A gauge listing notes the swap takes within 1 minute.
More preserving guides
See every pressure canners guide and all canning guides.
More picks: pressure canners, water bath vs pressure canner, how to water bath can and reusing canning lids.